Banners in *nix like systems is something that is being used for a very long time. System admins would sometimes use it to let users know that the system was going down (nowadays built-in with the shutdown command), or setup motd messages for SSH logins. Within the past years people got very creative with the use of different fonts and ASCII art.
For today’s post we will work With two different apps to display beautiful banners on your systems or config/dot files:
figlet - displays the banners
lolcat - colorizes the banners
Installation (Arch)
pacman -Sy figlet lolcat
figlet
Figlet comes with a default font and you can start using it right away
You can also download additional fonts (which is what we want). This will allow you to create a huge variety of banners.
Head over to the figlet-fonts project and take a look at the font files (*.flf). I would advise downloading the 3d.flf because that’s what we will use here. You can also clone the whole repo.
Place the new font in ~/.local/share/fonts/ and give it as an argument to the -f option in figlet:
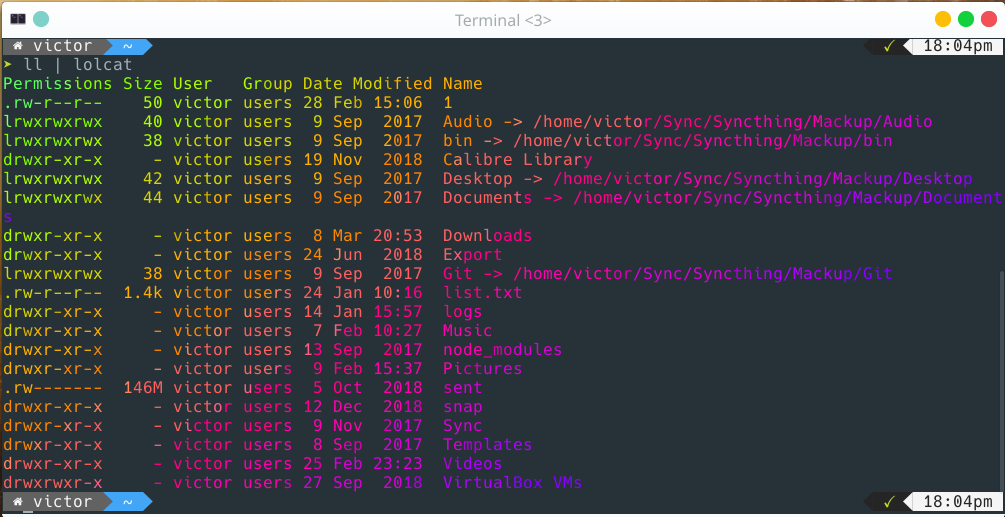
Lolcat produces a rainbow effect on terminal text. For example, try listing a directory and then piping it to lolcat. It should produce an output similar to the one below:
Putting it all together
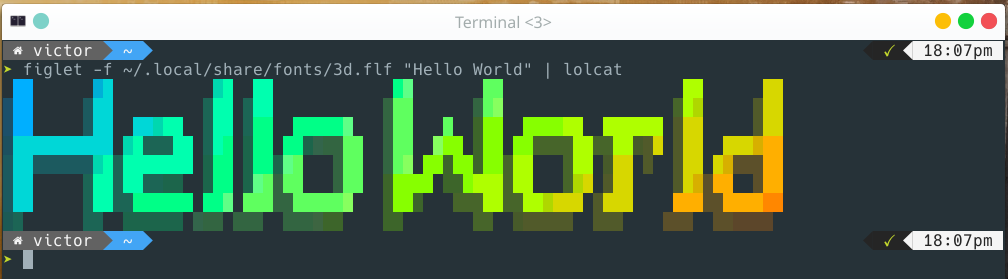
Use the same figlet command we used before to print out “Hello World” and pipe it through lolcat to get the result below:
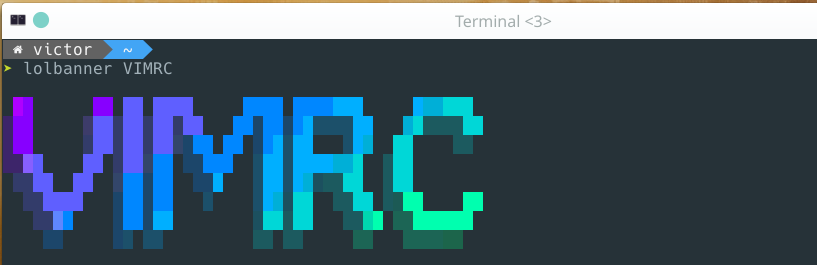
Optionally, you can add Bash alias/function to quickly display colorized banners:
Have fun adding banners to your dot files, config files and screenshots/videos. Just remember that for config files, the colors will not be saved/shown.
fzf is a command line fuzzy finder that can be used to automatically filter a list of items. Think of it as an interactive search tool, where items get filtered as you type characters in your terminal.
The video below shows a basic interaction using a list or files from the fd search utility:
fzf can also be used with other Bash tasks, like history, ssh and even file/dir completion. The GitHub page has a lot documentation on how to implement auto completion.
You can also use the --preview option to output the current selection into a preview box, and even call a command to be used with that value. For example, we can preview all the files in a folder by searching for files (with find or fd), piping the output to fzf, and then using a program like cat (on the example below I’m using bat, which is a clone of cat with the addition of syntax highlight and other cool things) to preview the files.
I’ve covered only the very basic usage for fzf, but it should give you an idea of how powerful this finder utility is. On future posts I’m going to cover other use cases, like the git workflow that I use.
Have you ever had the nead to count the lines of code in a project or a folder? If you did, or want to, cloc is a neat utility that can help with just that.
As per it’s description on the GitHub page, “cloc counts blank lines, comment lines, and physical lines of source code in many programming languages”. It displays a summary of file types and counted files, and then it breaks down a list of lines of code per language.
cloc is available on many distros default repo, as well as npm install. To install it use:
sudo apt install cloc                  # Debian, Ubuntu
sudo yum install cloc                  # Red Hat, Fedora
sudo dnf install cloc                  # Fedora 22 or later
sudo pacman -S cloc                    # Arch
sudo emerge -av dev-util/cloc          # Gentoo https://packages.gentoo.org/packages/dev-util/cloc
sudo apk add cloc                      # Alpine Linux
sudo pkg install cloc                  # FreeBSD
sudo port install cloc                 # Mac OS X with MacPorts
brew install cloc                      # Mac OS X with Homebrew
choco install cloc                     # Windows with Chocolatey
scoop install cloc                     # Windows with Scoop
Quick instructions on how to migrate a Unifi controller on Linux. Note that it requires SSH access to the AP and a bit of downtime.
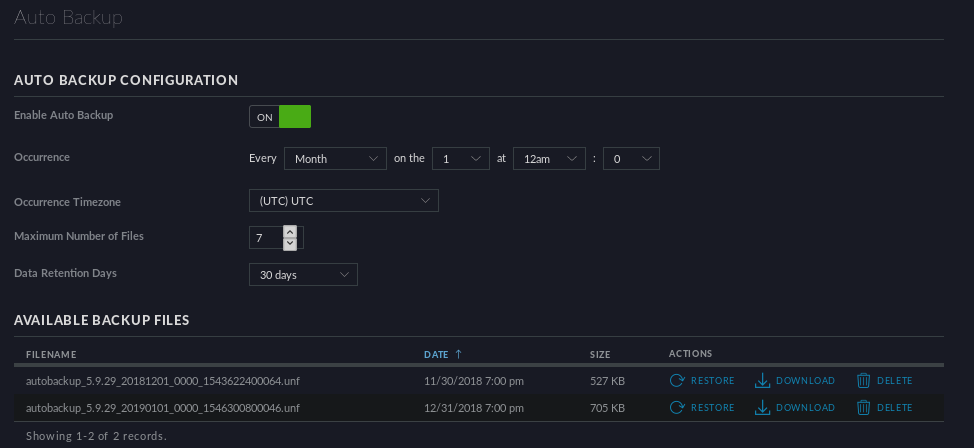
a. Logon to your old Unifi controller, go to Settings=>Auto Backup and download a backup
Note:Force a new backup if you have new changes
b. Browse to your AP, write down the IP address
c. Select the AP, go to Config=>Manage Device=>Forget this device and click on Forget (click ok on the alert)
d. Login to the new controller and on the first screen restore the backup you saved on step a
e. Once the controller is back up, SSH into the AP with the default user (ubnt:ubnt or root:ubnt) and run the following command (change [controler_ip] for the IP of your controller)
set-inform http://[controller-ip]:8080/inform
f. On the new controller, under devices, the AP should be showing for ‘adoption’. Click on ADOPT