The last time I had to configure the Waveshare 3.5” LCD on my Raspberry Pi 3B (see How to Install Waveshare 3.5” LCD on Ubuntu 20.04) I ran into a lot of issues. I even automated the install/setup so I could replicate it if needed, saving me from having to deal with the over-complicated process.
Last week I had to re-image my Raspberry Pi 3B, that I use as my UPS controller, due to a faulty SD card. And to my surprise, the install and configuration of the LCD screen was another fiasco. The instructions on the Waveshare Wiki don’t work, and made me very frustated.
So to save you some time, and hair (it’s too late for me as I’m already bald), I have outlined the steps that worked for me.
Configure the Driver and OS
a. Update the OS
sudo apt update
b. Download the driver and copy it to /boot/overlays/
g. Fix Console/Splash Screen Mapping /boot/firmware/cmdline.txt
Append to end of the line:
fbcon=map:1
h. Disable lightdm
sudo systemctl disable lightdm.service
i. Set Console Autologin
sudo raspi-config nonint do_boot_behaviour B2
Configure Auto-Login for the Default User
This is the default user (with GID 1000), and it’s usually the ‘pi’ user. You can check the output of id, and the user set in /etc/systemd/system/getty@tty1.service.d/autologin.conf.
b. On the raspberry pi, run xinput_calibrator and touch the red dots. You can output to a file if you prefer to configure on another terminal after (e.g.: ssh)
xinput_calibrator > output_file
c. Copy the output to /etc/X11/xorg.conf.d/99-calibration.conf
$ xinput_calibrator

	Calibrating standard Xorg driver "ADS7846 Touchscreen"
		current calibration values: min_x=0, max_x=65535 and min_y=0, max_y=65535
		If these values are estimated wrong, either supply it manually with the --precalib option, or run the 'get_precalib.sh' script to automatically get it (through HAL).
		--> Making the calibration permanent <--
	  copy the snippet below into '/etc/X11/xorg.conf.d/99-calibration.conf' (/usr/share/X11/xorg.conf.d/ in some distro's)
	Section "InputClass"
		Identifier	"calibration"
		MatchDriver	"evdev"
		Option	"MinX"	"21663"
		Option	"MaxX"	"22027"
		Option	"MinY"	"48912"
		Option	"MaxY"	"49185"
		Option	"SwapXY"	"1" # unless it was already set to 1
		Option	"InvertX"	"0"  # unless it was already set
		Option	"InvertY"	"0"  # unless it was already set
	EndSection
/etc/X11/xorg.conf.d/99-calibration.conf
Section "InputClass"
	Identifier	"calibration"
	MatchDriver	"evdev"
	Option	"MinX"	"21663"
	Option	"MaxX"	"22027"
	Option	"MinY"	"48912"
	Option	"MaxY"	"49185"
	Option	"SwapXY"	"1" # unless it was already set to 1
	Option	"InvertX"	"0"  # unless it was already set
	Option	"InvertY"	"0"  # unless it was already set
EndSection
Note: Don’t copy my values. You should use the ones from your output.
d. Reboot
Conclusion
That’s it! You should now have a working X11 desktop on your 3.5” LCD. If you ran into any specific issues with Debian Trixie that I missed, or if you have different calibration values, feel free to drop a comment below.
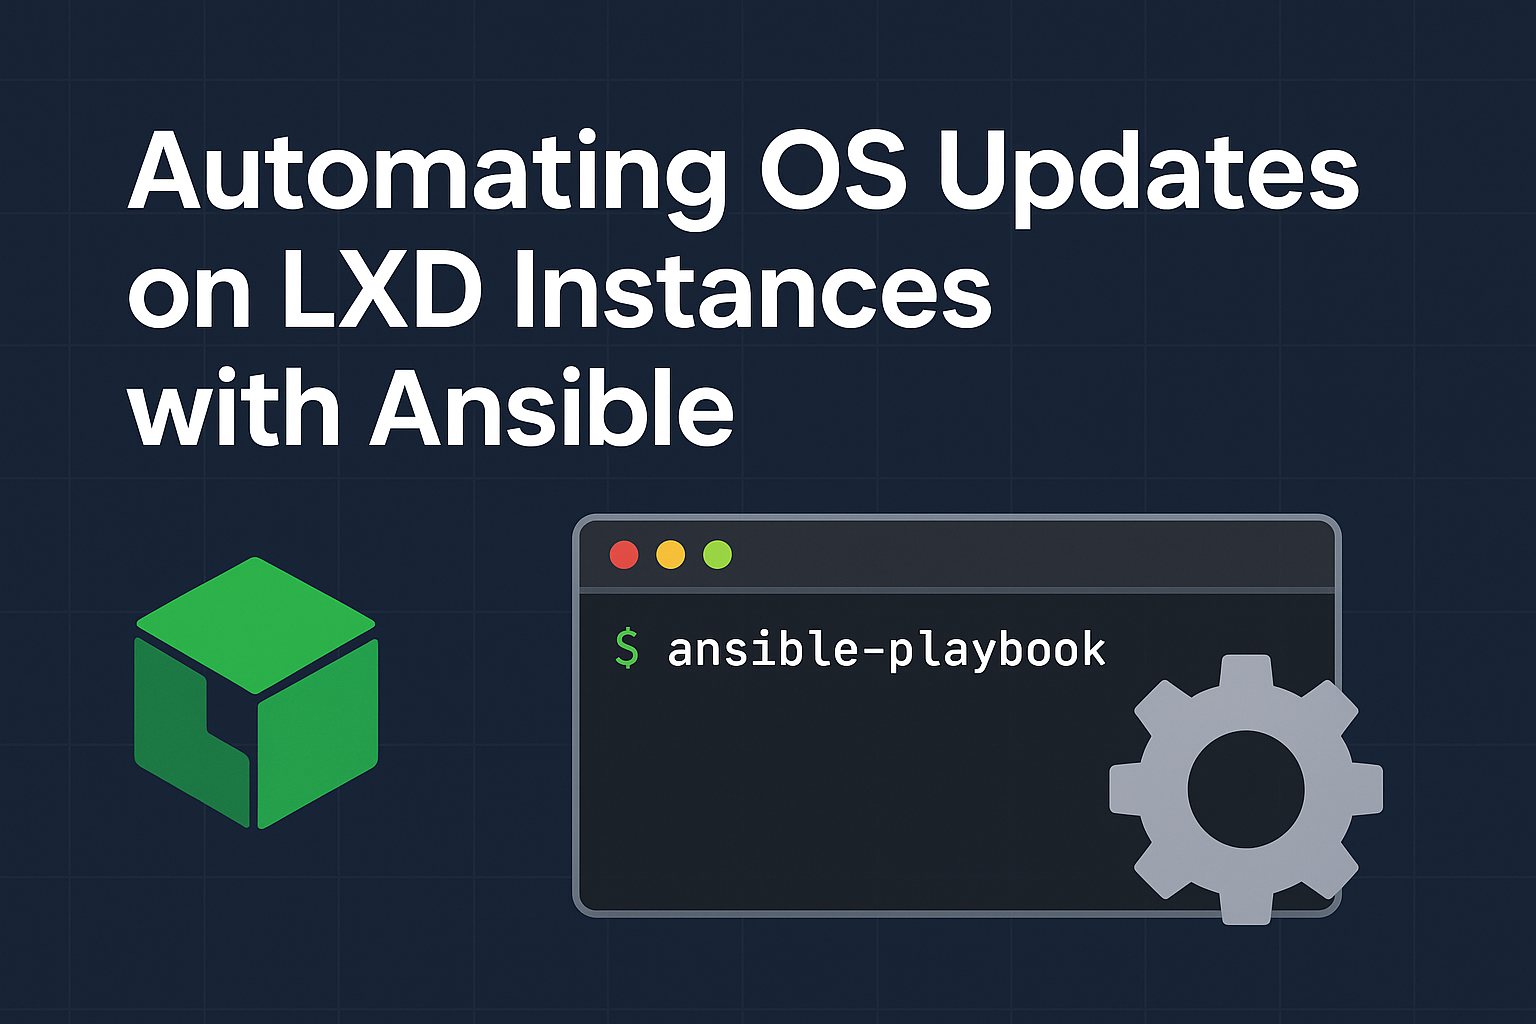
Keeping your LXD containers and VMs up to date can be a bit of a hassle — especially when you’re managing different distributions or even Windows instances. That’s why I built lxd-os-update, an Ansible project designed to automate the process of running OS updates across all your LXD environments.
It’s a simple yet powerful role that takes care of the entire cycle for you:
Starts stopped and frozen instances (configurable)
Runs OS updates for both APT and YUM-based Linux distros
Updates Windows servers via SSH and PowerShell
Restores each instance to its previous stopped or frozen state afterward
Why I Built It
When managing LXD VMs and containers, I often needed a way to keep everything patched without manually starting, updating, and stopping each instance.
Ansible seemed perfect for the job — but I quickly ran into a limitation with the Ansible LXD inventory plugin.
The plugin hardcodes ansible_connection to ssh whenever it detects an IP address. That means even if you explicitly set ansible_connection: lxd, Ansible will still try to connect via SSH, using the IP address as ansible_host.
Error: Failed to fetch instance "10" in project "default": Instance not found
That’s because Ansible is trying to connect to an instance literally named “10”, taken from the IP address.
The Workaround: A Custom Inventory Script
To get around this, I created a custom inventory script, included in the project. It defines instances manually and correctly sets ansible_connection: lxd (except for Windows, which still uses SSH).
This approach bypasses the plugin’s issue and ensures Ansible connects directly through LXD when possible.
Requirements
Before running the playbook, make sure your environment meets these conditions:
Ansible on the host
Ansible collections (see requirements.yml):
community.general
ansible.windows
Each instance must have the image.os config attribute set (see below)
python3 should be installed inside the instances
The LXD agent must be installed and running inside the instances
For Windows instances, OpenSSH server must be enabled and configured for an administrator user
Setting the image.os Attribute
The automation relies on the image.os attribute to detect the OS family. You can view and set it like this:
$ lxc list -cns,image.os:OS
+------------------+---------+--------+
|       NAME       |  STATE  |   OS   |
+------------------+---------+--------+
| jellyfin         | STOPPED | ubuntu |
| rhel9            | STOPPED | rhel   |
| windows11        | RUNNING |        |   <--- MISSING
+------------------+---------+--------+
You can manually set the value with:
# Example for a Windows 11 instance
$ lxc config set windows11 image.os=windows

# Example for a RHEL 9 instance
$ lxc config set rhel9 image.os=rhel
Installing the LXD Agent
The LXD agent enables direct Ansible communication through the LXD plugin. Refer to your distribution’s documentation on how to install and start it.
Configuring Windows for SSH
For Windows instances, Ansible connects over SSH. So you’ll need to configured it, preferrably with an SSH key.
a. Enable OpenSSH server and configure the firewall:
# Start the sshd service
Start-Service sshd

# OPTIONAL but recommended:
Set-Service -Name sshd -StartupType 'Automatic'

# Install the OpenSSH Server
Add-WindowsCapability -Online -Name (Get-WindowsCapability -Online | Where-Object Name -like 'OpenSSH.Server*').name

# Confirm the Firewall rule is configured. It should be created automatically by setup. Run the following to verify
if (!(Get-NetFirewallRule -Name "OpenSSH-Server-In-TCP" -ErrorAction SilentlyContinue)) {
    Write-Output "Firewall Rule 'OpenSSH-Server-In-TCP' does not exist, creating it..."
    New-NetFirewallRule -Name 'OpenSSH-Server-In-TCP' -DisplayName 'OpenSSH Server (sshd)' -Enabled True -Direction Inbound -Protocol TCP -Action Allow -LocalPort 22
} else {
    Write-Output "Firewall rule 'OpenSSH-Server-In-TCP' has been created and exists."
}
b. Test the connection
c. Create a new ssh key pair if desired
d. Copy the contents of your public key (e.g.: id_rsa.pub) to C:\ProgramData\ssh\administrators_authorized_keys
e. Change de default shell to PowerShell in the registry key HKEY_LOCAL_MACHINE\SOFTWARE\OpenSSH\DefaultShell:
Start any stopped or frozen instances (if configured)
Run system updates for each one
Reboot if required
Return the instances to their previous state
Final Thoughts
This setup has saved me a lot of time keeping my LXD environment consistent and secure. Whether you’re managing a small lab or a larger test cluster, automating OS updates with Ansible can make your maintenance much smoother — and less error-prone.
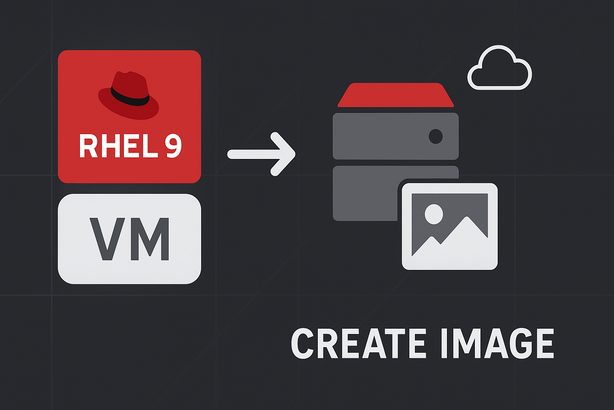
Following the LXD theme of my previous posts, today I’m going to walk you through creating a RHEL 9 VM on LXD, and then show you how to turn that VM into an image. This way, you can spin up new RHEL 9 VMs whenever you want—without having to sit through the whole install/setup process again.
To follow along, you’ll need an active Red Hat subscription. If you’re doing this for personal use (like self-development, home lab tinkering, or just because you enjoy virtual machines as much as Netflix), you can download RHEL for free when you sign up for the Red Hat Developer Subscription for Individuals.
1. What is the Red Hat Developer program’s Red Hat Developer Subscription for Individuals?
The Red Hat Developer Subscription for Individuals is a no-cost offering of the Red Hat Developer program and includes access to Red Hat Enterprise Linux among other Red Hat products. It is a program and an offering designed for individual developers, available through the Red Hat Developer program.
2. What Red Hat Enterprise Linux developer subscription is made available at no cost?
The no-cost Red Hat Developer Subscription for Individuals is available and includes Red Hat Enterprise Linux along with numerous other Red Hat technologies. Users can access this no-cost subscription by joining the Red Hat Developer program at developers.redhat.com/register. Joining the program is free.
Creating the VM
I’ll be using RHEL 9 here, but the same steps apply to other versions.
a. Create an empty VM:
lxc init rhel9 --vm --empty
b. Give the VM a 20GB root disk:
lxc config device override rhel9 root size=20GiB
Optional: increase CPU and RAM limits if needed (depending on your profile).
c. Add the install disk:
lxc config device add rhel9 install disk source=/home/victor/Downloads/OS/rhel-9.6-x86_64-dvd.iso boot.priority=10
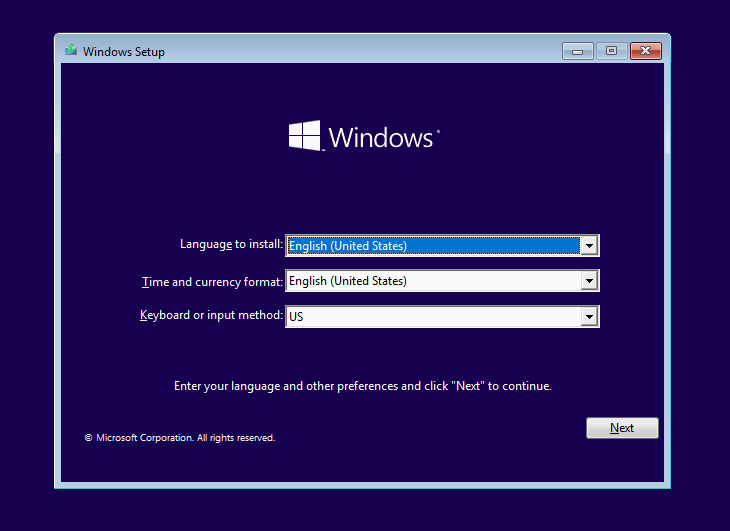
d. Start the VM and go through the RHEL install (not covered here):
lxc start rhel9
e. Remove the install disk when the install is complete:
lxc device remove rhel9 install
Install the LXD agent
It’s a good idea to include the LXD agent in your image—otherwise, you’ll miss out on nice integration features.
a. Mount the config device:
mkdir /mnt/iso

mount -t virtiofs config /mnt/iso

cd /mnt/iso
b. Install and reboot:
c. Check that the agent is running:
$ lxc exec rhel9 -- systemctl is-active lxd-agent
active
Prepare the OS
Run Updates
This section is optional and you only need to follow in case you want to get your image updated with the current packages.
a. Connect the VM to your Red Hat account:
I’m using Red Hat Enterprise Linux Individual Developer Subscription
# rhc connect
Connecting rhel9 to Red Hat.
This might take a few seconds.

Username: jdoe
Password: *********

● Connected to Red Hat Subscription Management
● Connected to Red Hat Insights
● Activated the Remote Host Configuration daemon

Successfully connected to Red Hat!

Manage your connected systems: https://red.ht/connector
c. Install any packages or make tweaks you’d like baked into the image.
Clean up the OS
Before creating the image, let’s tidy things up.
a. Disconnect the VM from Red Hat’s network:
# rhc disconnect
Disconnecting rhel9 from Red Hat.
This might take a few seconds.

● Deactivated the Remote Host Configuration daemon
● Disconnected from Red Hat Insights
● Disconnected from Red Hat Subscription Management

Manage your connected systems: https://red.ht/connector
b. Connect to the terminal as root (either via the Terminal tab on LXD’s UI, or with lxc exec rhel9 -- /bin/bash).
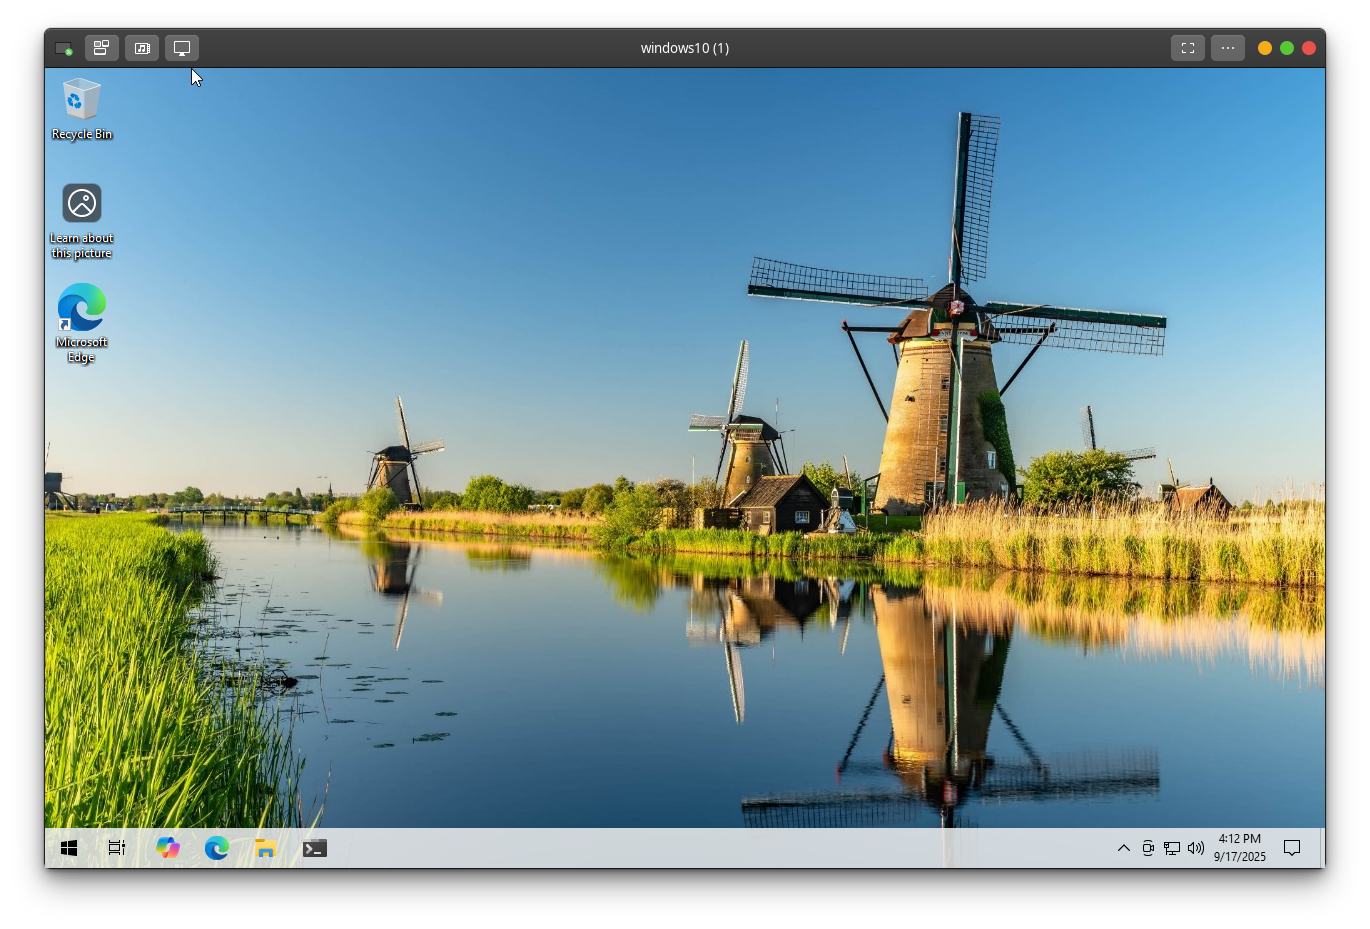
Yes, you can run Windows 10 or 11 inside LXD. It’s actually not that hard—just a few prep steps and some command-line magic. These instructions are written for Arch, but the process is nearly the same on other distros (package names may change a bit).
Last week, I attended a virtual talk hosted by Canonical on building a homelab with microservices. During the session, I discovered a new (to me) and very cool utility that’s perfect for managing virtual machines and containers from a centralized interface: LXD, or the Linux Container Daemon.
While LXD isn’t new—it’s actually been around since 2016—it’s still flying under the radar for a lot of homelab enthusiasts. After seeing it in action, I realized it’s a hidden gem worth exploring.
Why LXD Stands Out
LXD offers a unified way to manage both containers and VMs—whether through the command line (lxc), a web-based UI, or via REST APIs (though I won’t dive into the API side here).
This makes LXD an excellent choice for home labs because it lets you manage everything from one central “application” instead of juggling multiple tools for VMs and containers separately.
Features That Caught My Attention
Here are some of the standout features that make LXD so powerful:
Run System Containers
LXD can run full Linux distributions inside containers (unlike Docker, which is app-focused).
Containers behave like lightweight virtual machines.
You can run Ubuntu, Alpine, Debian, CentOS, etc., inside LXD containers.
Run Virtual Machines
LXD supports running full virtual machines (VMs) using QEMU/KVM.
This allows mixing containers and VMs on the same host with a single tool.
Build and publish your own custom container/VM images.
Networking
LXD provides built-in bridged, macvlan, and fan networking modes.
Supports IPv4 and IPv6, NAT, and DNS.
Resource Limits
Apply resource limits like CPU, RAM, disk I/O, network bandwidth.
Useful for multi-tenant or production environments.
Cluster Mode
LXD supports clustering — multiple nodes sharing the same configuration.
There’s a lot more that LXD can do, but these are the features that really stood out for my personal homelab use case.
Getting Started
LXD currently ships via Snap packages. You can easily install it by running the command below, and that will also install all the requirements:
sudo snap install lxd
Once installed, you’ll need to initialize it. Running lxd init will prompt a series of configuration questions (e.g., storage, network type, clustering, etc.). If you’re just setting things up for testing, feel free to use the same answers I did below — but it’s always a good idea to consult the official LXD Documentation for a deeper understanding:
$ sudo lxd init

Would you like to use LXD clustering? (yes/no) [default=no]:
Do you want to configure a new storage pool? (yes/no) [default=yes]:
Name of the new storage pool [default=default]:
Name of the storage backend to use (btrfs, ceph, dir, lvm, powerflex) [default=btrfs]: dir
Would you like to connect to a MAAS server? (yes/no) [default=no]:
Would you like to create a new local network bridge? (yes/no) [default=yes]:
What should the new bridge be called? [default=lxdbr0]:
What IPv4 address should be used? (CIDR subnet notation, “auto” or “none”) [default=auto]:
What IPv6 address should be used? (CIDR subnet notation, “auto” or “none”) [default=auto]: none
Would you like the LXD server to be available over the network? (yes/no) [default=no]: yes
Address to bind LXD to (not including port) [default=all]:
Port to bind LXD to [default=8443]:
Would you like stale cached images to be updated automatically? (yes/no) [default=yes]:
Would you like a YAML "lxd init" preseed to be printed? (yes/no) [default=no]:
The lxc command is a command-line client used to interact with the LXD daemon. To use the lxc command as a non-root user, you’ll need to add your user to the ‘lxd’ group:
sudo usermod -a -G lxd [my_user]
⚠️ Important Notes:
This change only takes effect after you log out and back in.
Adding a non-root user to the ‘lxd’ group essentialy gives root access to that user.
Configuring Access to the WEB UI
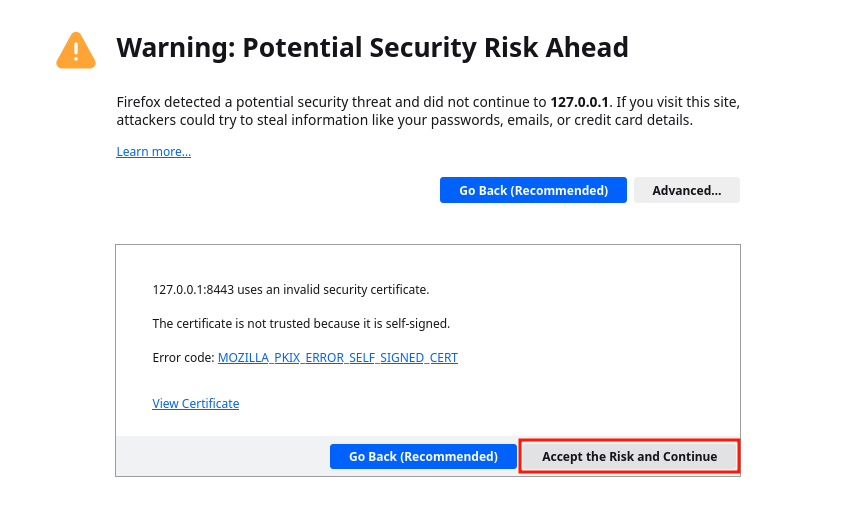
At this point, LXD should be running. You can now access the Web UI at ‘https://127.0.0.1:8443/'.
Since it uses a self-signed certificate, your browser will warn you. Just click “Accept the Risk and Continue” (or equivalent in your browser):
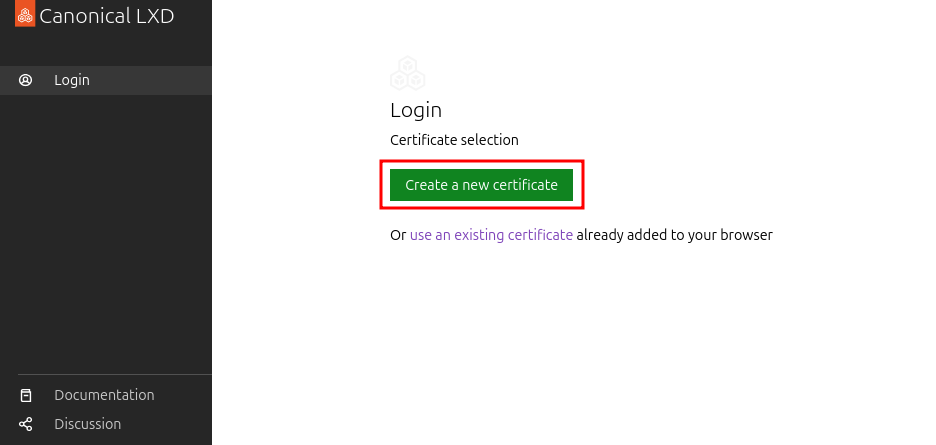
LXD uses certificate authentication, so you’ll need to generate and trust one.
a. Click “Create a new certificate”:
b. Then click “Generate”:
c. Enter a password for the certificate and click on “Generate certificate”:
d. Download the certificate and trust it from the terminal:
$ lxc config trust add Downloads/lxd-ui-127.0.0.1.crt

To start your first container, try: lxc launch ubuntu:24.04
Or for a virtual machine: lxc launch ubuntu:24.04 --vm
f. To access the Web UI you’ll also need to import the .pfx file into your browser’s certificate store. Follow your browser’s instructions for importing client certificates:
g. Once imported, restart your browser and visit ‘https://127.0.0.1:8443/' again — you should be logged in automatically:
Additional Configuration
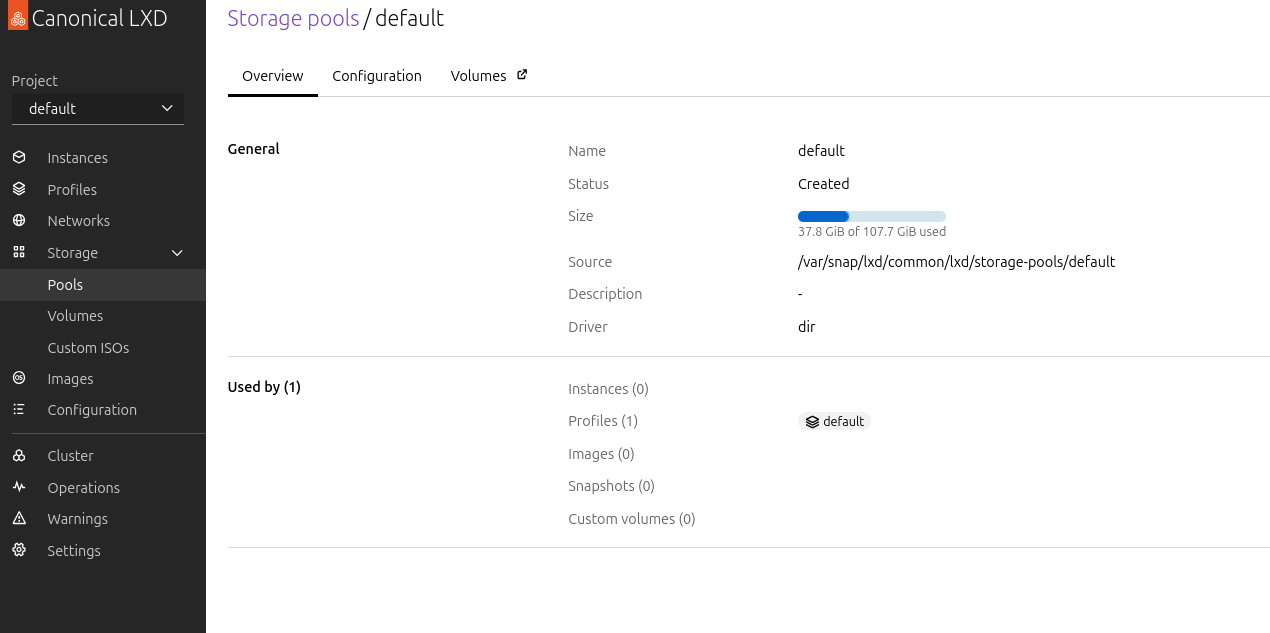
By default the storage, when ‘dir’ was set as type, will be inside the storage for the LXD snap (/var/snap/lxd/common/lxd/storage-pools/default). You will probably want to change that. Unfortunatelly you can’t change the default location, so we’ll just add a new one and set it to default.
Let’s make this change via command line.
a. First create a new volume pool (I created mine in /mnt/storage2/VMs/lxd):
$ lxc storage create main dir source=/mnt/storage2/VMs/lxd

Storage pool main created
b. You can check that it was created with:
$ lxc storage list

+---------+--------+------------------------------------------------+-------------+---------+---------+
|  NAME   | DRIVER |                     SOURCE                     | DESCRIPTION | USED BY |  STATE  |
+---------+--------+------------------------------------------------+-------------+---------+---------+
| default | dir    | /var/snap/lxd/common/lxd/storage-pools/default |             | 1       | CREATED |
+---------+--------+------------------------------------------------+-------------+---------+---------+
| main    | dir    | /mnt/storage2/VMs/lxd                          |             | 0       | CREATED |
+---------+--------+------------------------------------------------+-------------+---------+---------+
c. Now let’s set it as the default pool:
lxc profile device set default root pool=[pool name]
When you create an instance, LXD automatically creates the required storage volumes for it, so I will not cover it here.
Creating Instances
Creating both container and VM instances via the UI is extremelly easy.
Containers
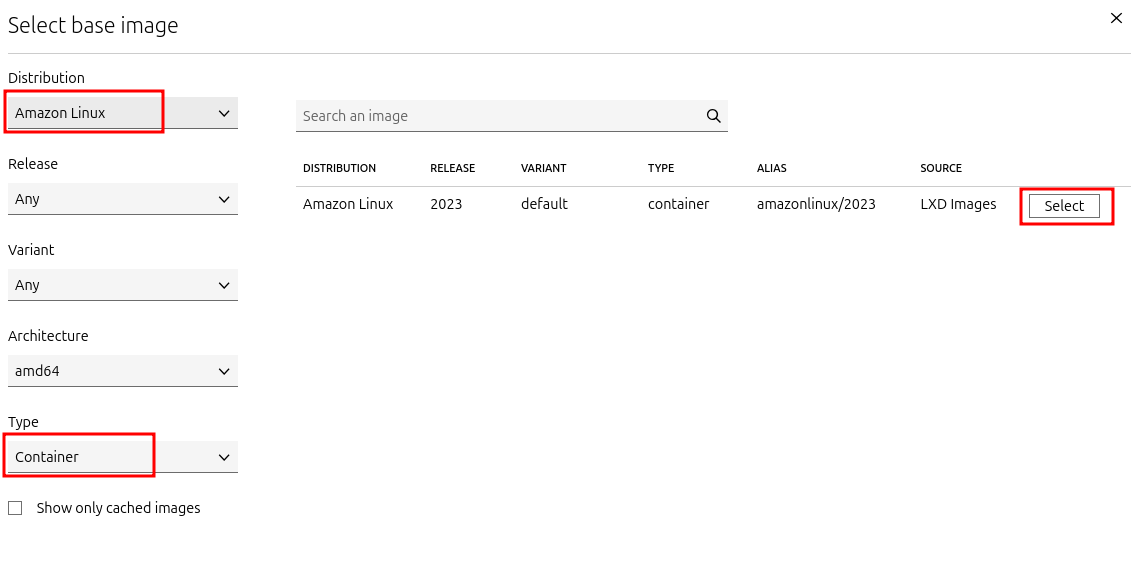
We are going to create a container based on the AmazonLinux 2023 image.
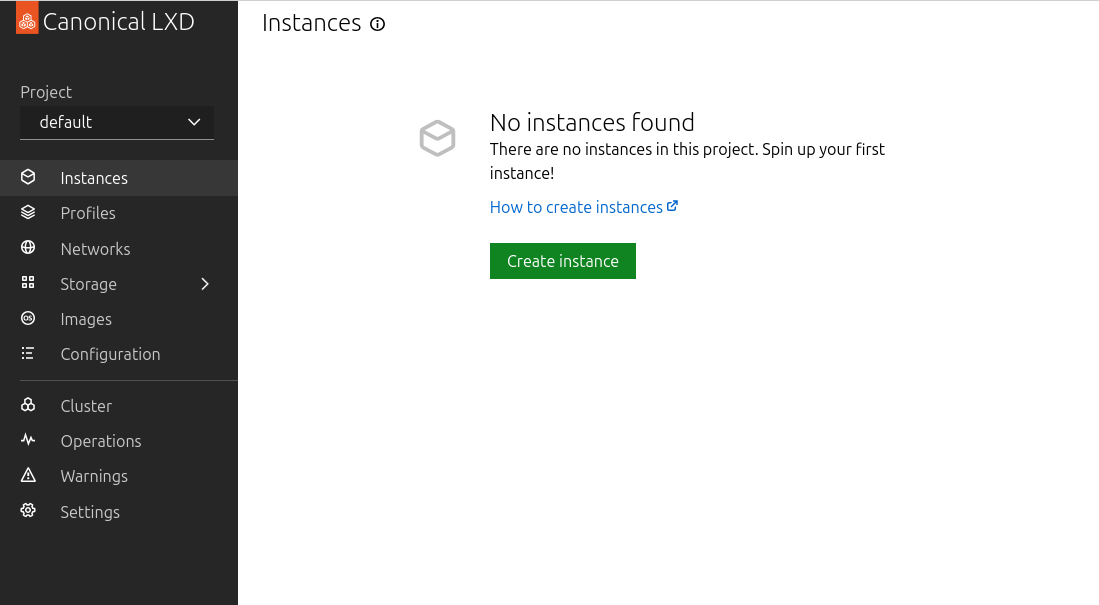
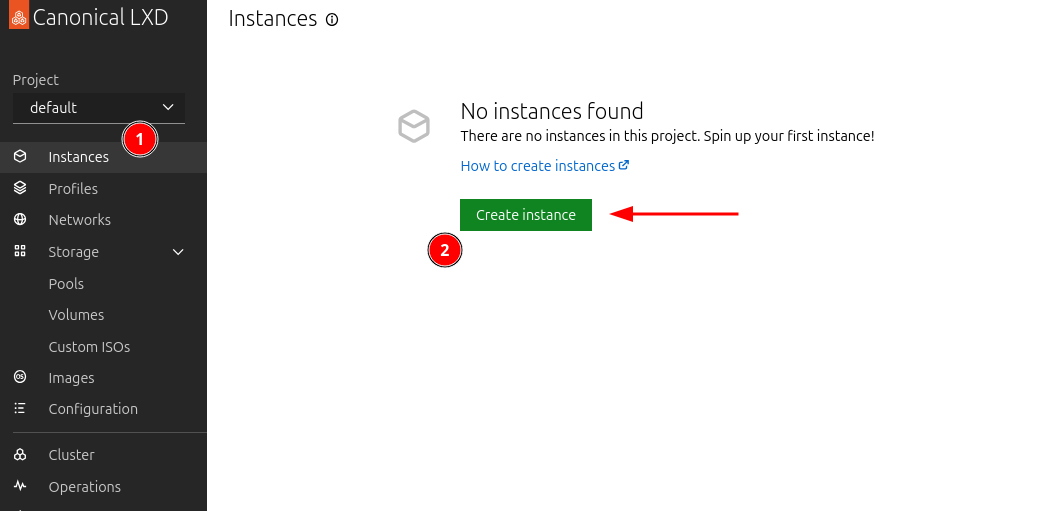
a. Back on the UI, browse to “Instances” and click on “Create instance”:
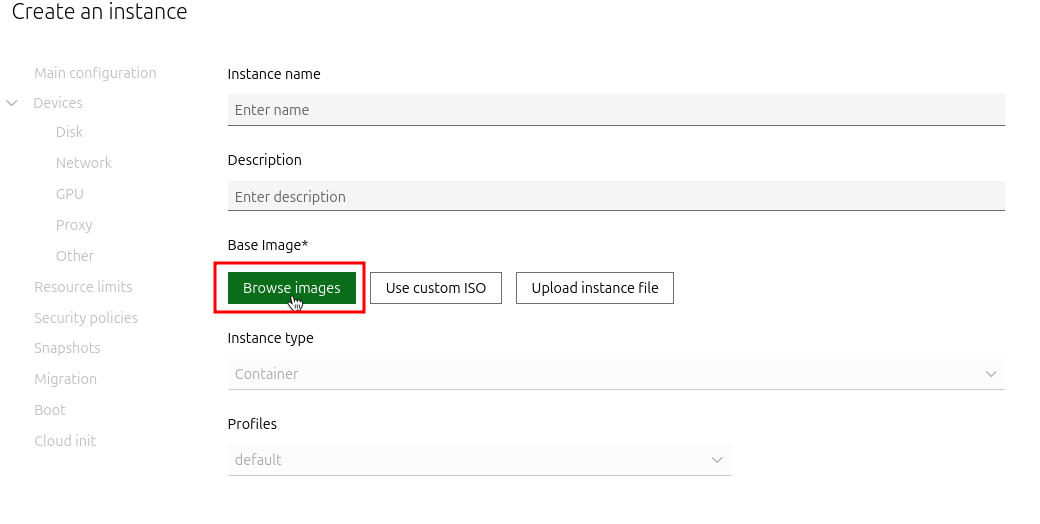
b. Click on “Browse images”:
c. Filter the distribution by “Amazon Linux”, the type as “Container”, and click on “Select”:
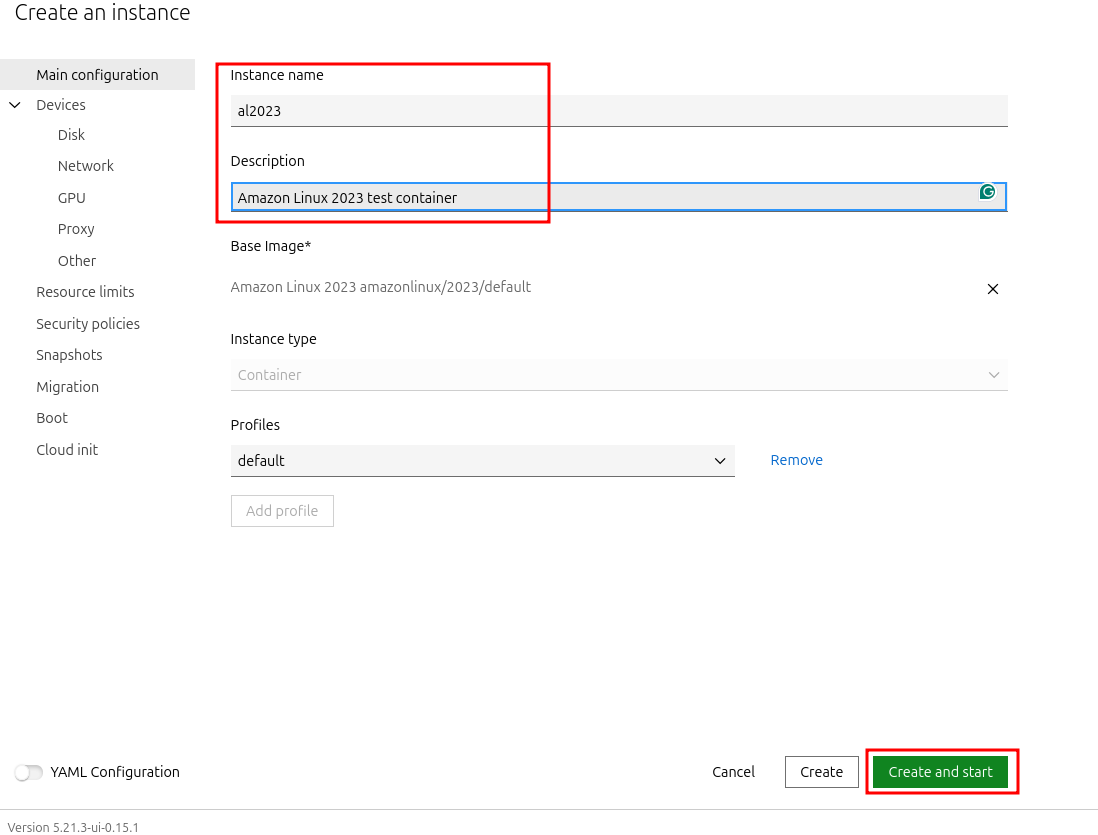
d. Give it a name and description and click on “Create and start”:
Tip: Don’t forget to poke around the options on the left next time you create an instance.
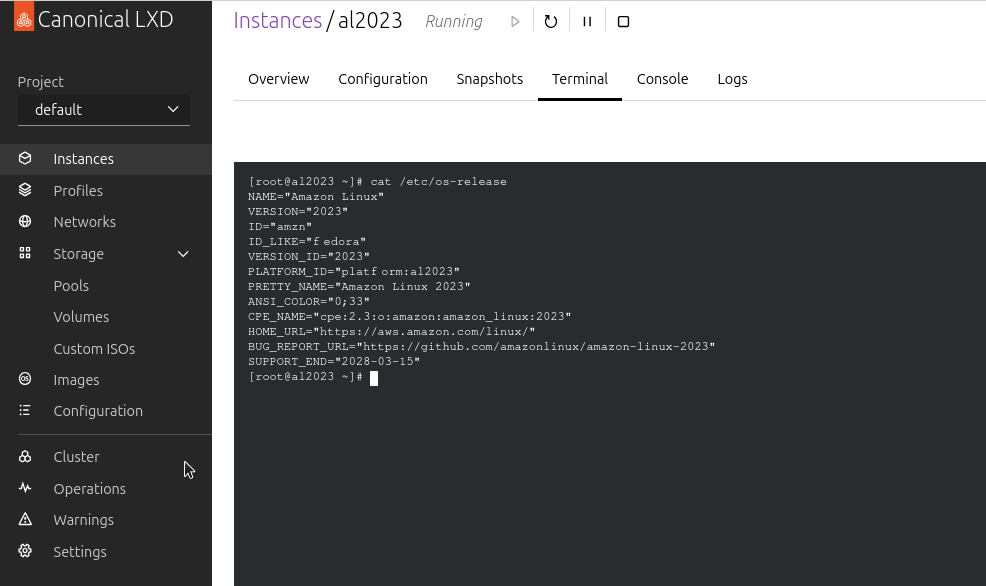
It should only take a few seconds for your container to be created and start running. You can access the container from the “Terminal” tab:
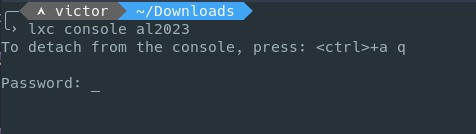
You can also access it via the terminal with lxc console, however that will require a password:
VMs
We are going to create an Ubuntu VM with graphical interface.
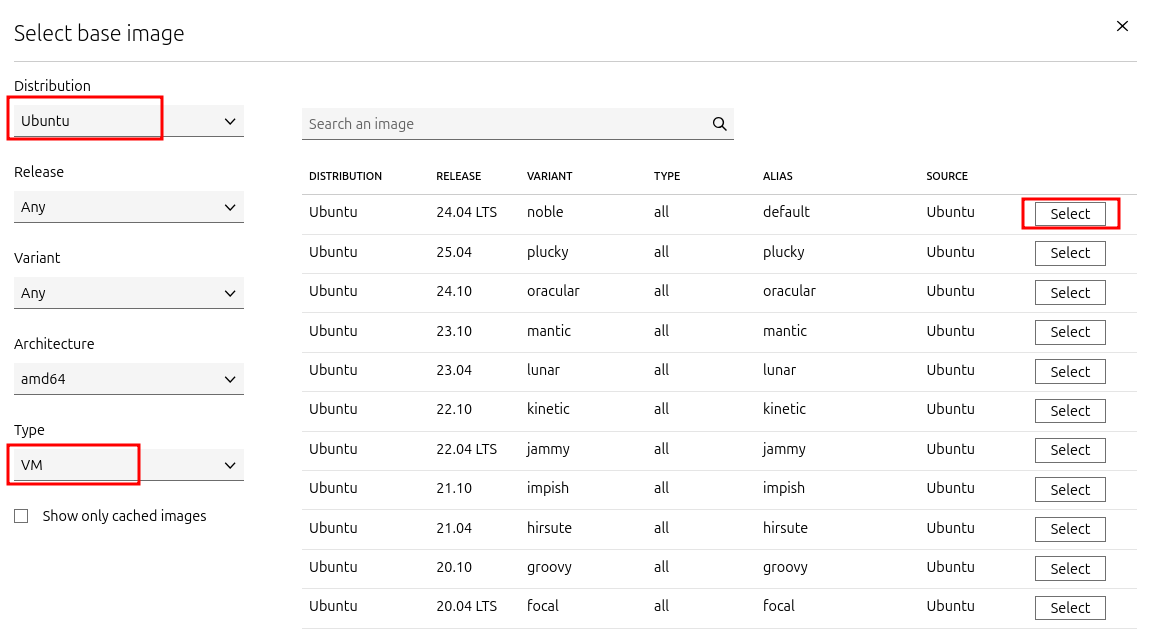
a. Repeat the same steps as before, but now select Ubuntu as the distribution, VM as the type, and a LTS version:
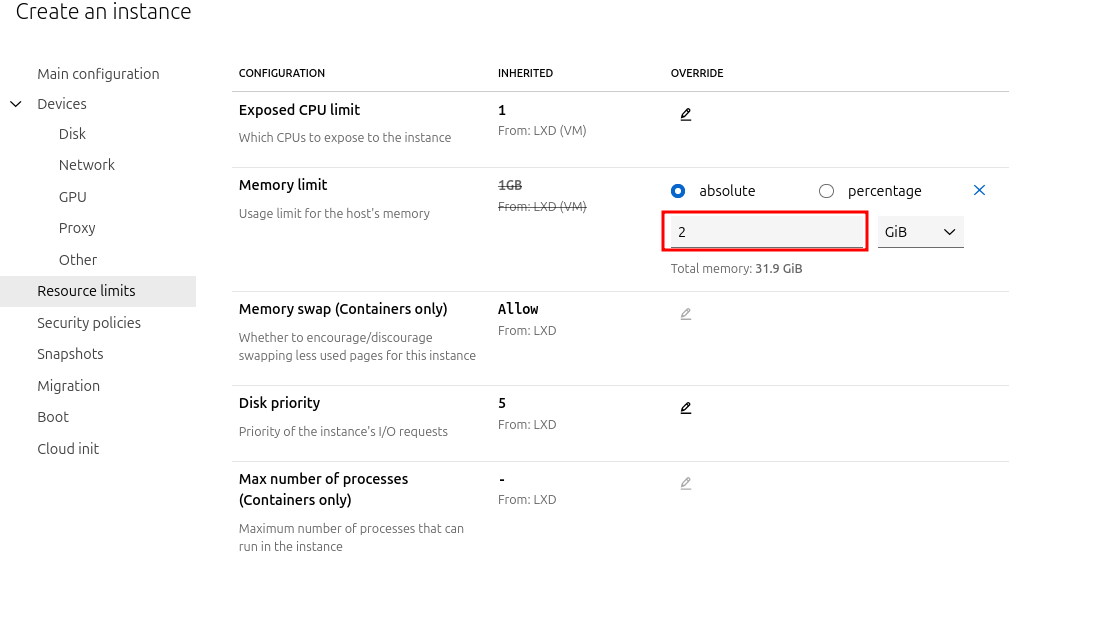
b. Give it a name/description, and under “Resource limits” set the memory limit to ‘2 GiB’. Then click on “Create and start”:
c. Once the VM is running, access the terminal tab the same way we did before and install ubuntu-desktop:
apt update && apt install ubuntu-desktop
Now is a great time to go grab a coffee… this will take a little while…
d. When the install is complete change the password for the ‘ubuntu’ user and reboot:
# passwd ubuntu

New password:
BAD PASSWORD: The password is shorter than 8 characters
Retype new password:
passwd: password updated successfully

# reboot
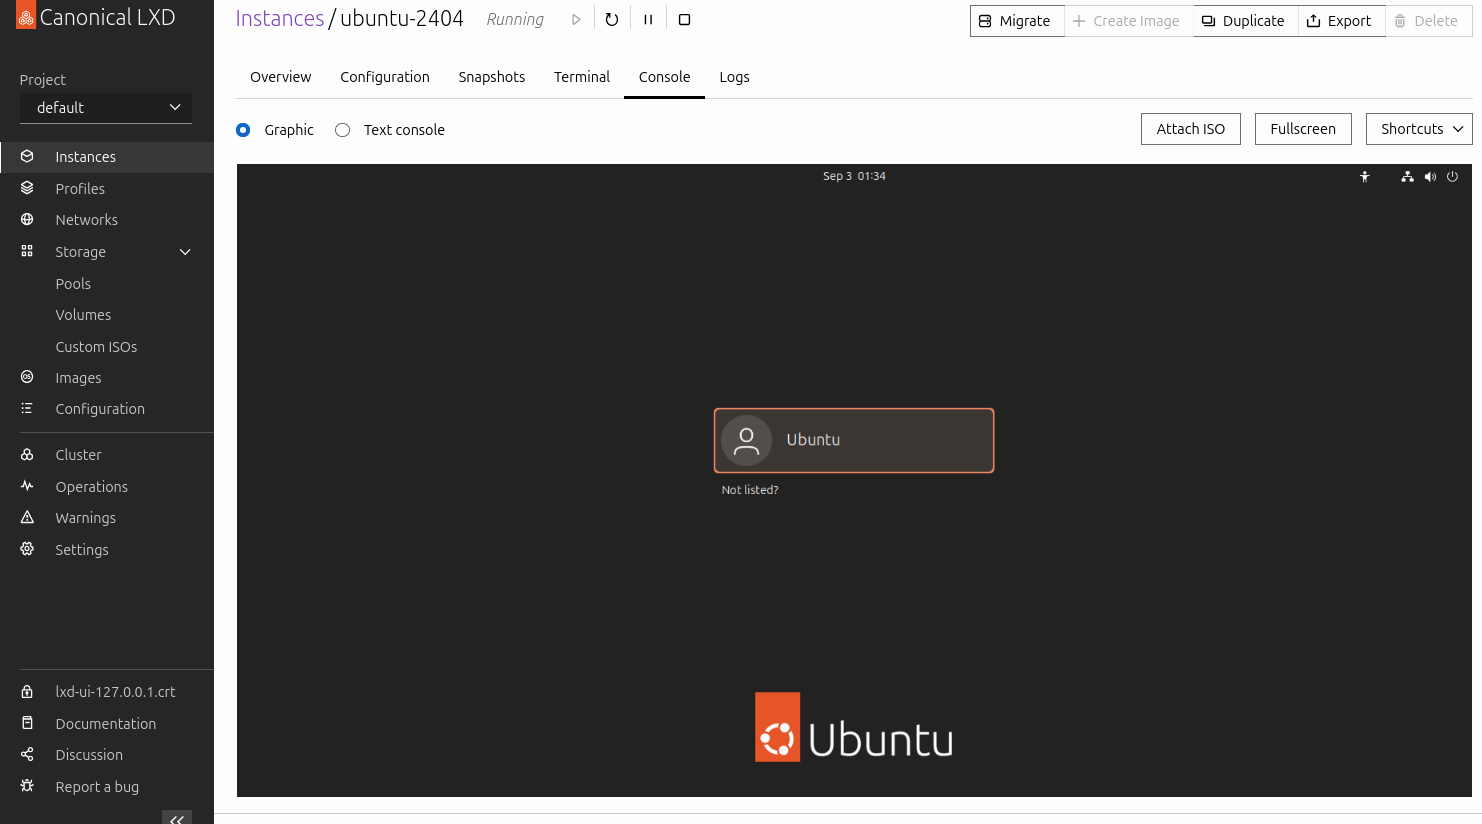
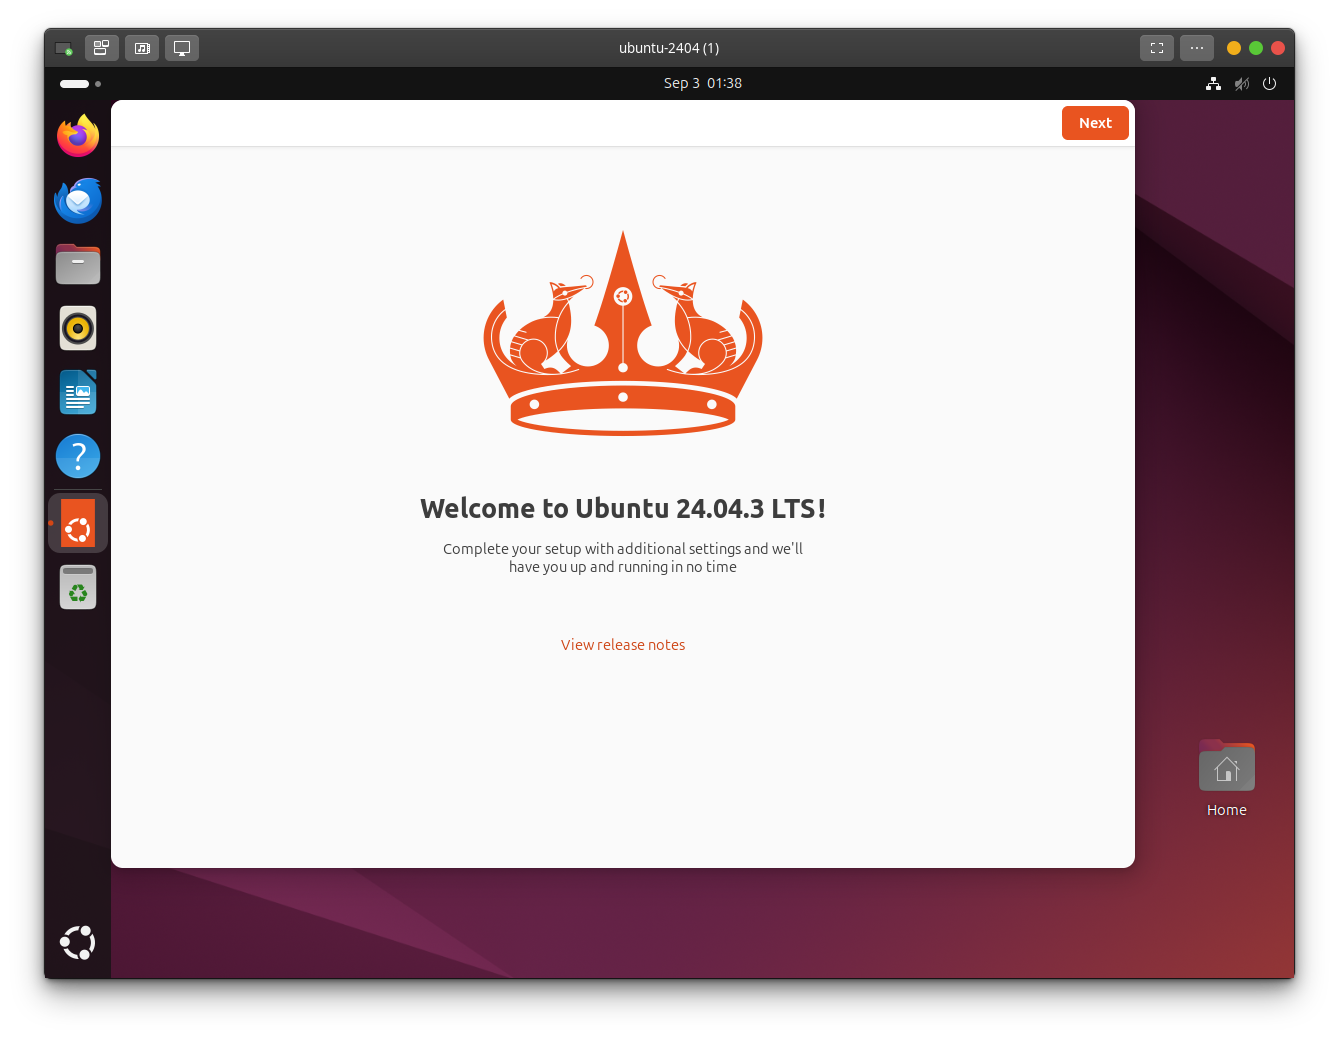
d. Go to the “Console” tab. You should see boot output and evetually be presented with the login window. You can login and use the VM from your browser:
And you can also access the VM graphical interface via the lxc connect command with the --type=vga flag:
lxc console ubuntu-2404 --type=vga
Conclusion
LXD might not be as flashy or widely known as Docker, but it fills a unique and valuable niche. It gives you the simplicity of containers and the power of full VMs — all under one roof. For homelabbers, that means less tool sprawl, cleaner management, and more flexibility to experiment.
Whether you’re just getting started with containers or looking to consolidate your virtualization setup, LXD is absolutely worth a try. With its web UI, clustering support, and straightforward setup, it can quickly become the backbone of a modern homelab.