Last week, I attended a virtual talk hosted by Canonical on building a homelab with microservices. During the session, I discovered a new (to me) and very cool utility that’s perfect for managing virtual machines and containers from a centralized interface: LXD, or the Linux Container Daemon.
While LXD isn’t new—it’s actually been around since 2016—it’s still flying under the radar for a lot of homelab enthusiasts. After seeing it in action, I realized it’s a hidden gem worth exploring.
Why LXD Stands Out
LXD offers a unified way to manage both containers and VMs—whether through the command line (lxc), a web-based UI, or via REST APIs (though I won’t dive into the API side here).
This makes LXD an excellent choice for home labs because it lets you manage everything from one central “application” instead of juggling multiple tools for VMs and containers separately.
Features That Caught My Attention
Here are some of the standout features that make LXD so powerful:
- Run System Containers
- LXD can run full Linux distributions inside containers (unlike Docker, which is app-focused).
- Containers behave like lightweight virtual machines.
- You can run Ubuntu, Alpine, Debian, CentOS, etc., inside LXD containers.
- Run Virtual Machines
- LXD supports running full virtual machines (VMs) using QEMU/KVM.
- This allows mixing containers and VMs on the same host with a single tool.
- Manage Container & VM Lifecycle
- Create, start, stop, pause, delete containers/VMs.
- Snapshots and restore functionality.
- Clone containers or VMs.
- Image Management
- Download and use images from remote repositories.
- Build and publish your own custom container/VM images.
- Networking
- LXD provides built-in bridged, macvlan, and fan networking modes.
- Supports IPv4 and IPv6, NAT, and DNS.
- Resource Limits
- Apply resource limits like CPU, RAM, disk I/O, network bandwidth.
- Useful for multi-tenant or production environments.
- Cluster Mode
- LXD supports clustering — multiple nodes sharing the same configuration.
There’s a lot more that LXD can do, but these are the features that really stood out for my personal homelab use case.
Getting Started
LXD currently ships via Snap packages. You can easily install it by running the command below, and that will also install all the requirements:
sudo snap install lxd
Once installed, you’ll need to initialize it. Running lxd init will prompt a series of configuration questions (e.g., storage, network type, clustering, etc.). If you’re just setting things up for testing, feel free to use the same answers I did below — but it’s always a good idea to consult the official LXD Documentation for a deeper understanding:
$ sudo lxd init

Would you like to use LXD clustering? (yes/no) [default=no]:
Do you want to configure a new storage pool? (yes/no) [default=yes]:
Name of the new storage pool [default=default]:
Name of the storage backend to use (btrfs, ceph, dir, lvm, powerflex) [default=btrfs]: dir
Would you like to connect to a MAAS server? (yes/no) [default=no]:
Would you like to create a new local network bridge? (yes/no) [default=yes]:
What should the new bridge be called? [default=lxdbr0]:
What IPv4 address should be used? (CIDR subnet notation, “auto” or “none”) [default=auto]:
What IPv6 address should be used? (CIDR subnet notation, “auto” or “none”) [default=auto]: none
Would you like the LXD server to be available over the network? (yes/no) [default=no]: yes
Address to bind LXD to (not including port) [default=all]:
Port to bind LXD to [default=8443]:
Would you like stale cached images to be updated automatically? (yes/no) [default=yes]:
Would you like a YAML "lxd init" preseed to be printed? (yes/no) [default=no]:
The lxc command is a command-line client used to interact with the LXD daemon. To use the lxc command as a non-root user, you’ll need to add your user to the ‘lxd’ group:
sudo usermod -a -G lxd [my_user]
⚠️ Important Notes:
- This change only takes effect after you log out and back in.
- Adding a non-root user to the ‘lxd’ group essentialy gives root access to that user.
Configuring Access to the WEB UI
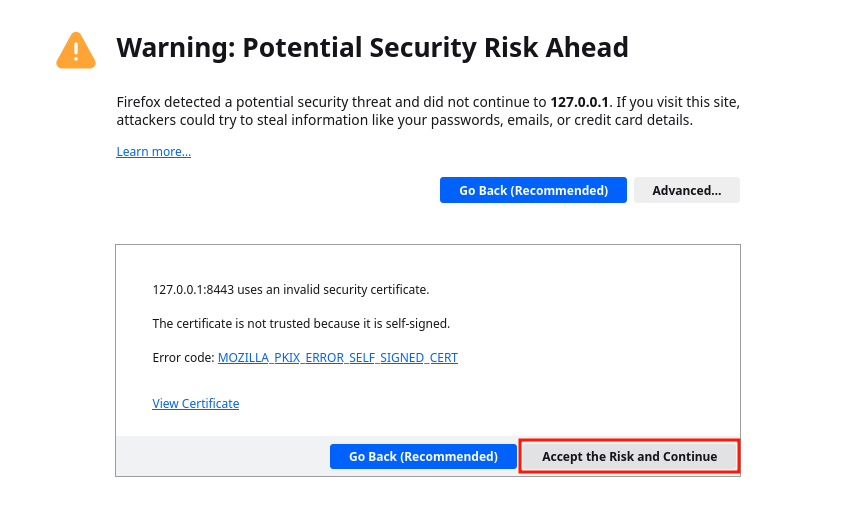
At this point, LXD should be running. You can now access the Web UI at ‘https://127.0.0.1:8443/'.
Since it uses a self-signed certificate, your browser will warn you. Just click “Accept the Risk and Continue” (or equivalent in your browser):
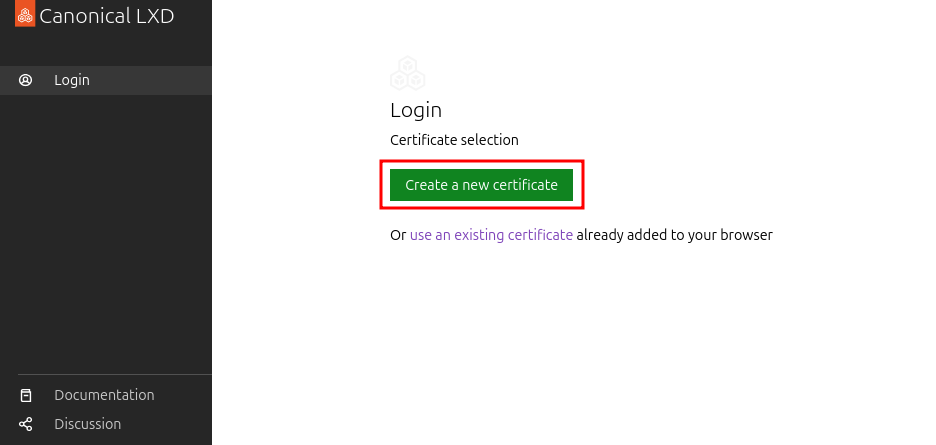
LXD uses certificate authentication, so you’ll need to generate and trust one.
a. Click “Create a new certificate”:
b. Then click “Generate”:

c. Enter a password for the certificate and click on “Generate certificate”:

d. Download the certificate and trust it from the terminal:

$ lxc config trust add Downloads/lxd-ui-127.0.0.1.crt

To start your first container, try: lxc launch ubuntu:24.04
Or for a virtual machine: lxc launch ubuntu:24.04 --vm
f. To access the Web UI you’ll also need to import the .pfx file into your browser’s certificate store. Follow your browser’s instructions for importing client certificates:

g. Once imported, restart your browser and visit ‘https://127.0.0.1:8443/' again — you should be logged in automatically:
Additional Configuration
By default the storage, when ‘dir’ was set as type, will be inside the storage for the LXD snap (/var/snap/lxd/common/lxd/storage-pools/default). You will probably want to change that. Unfortunatelly you can’t change the default location, so we’ll just add a new one and set it to default.
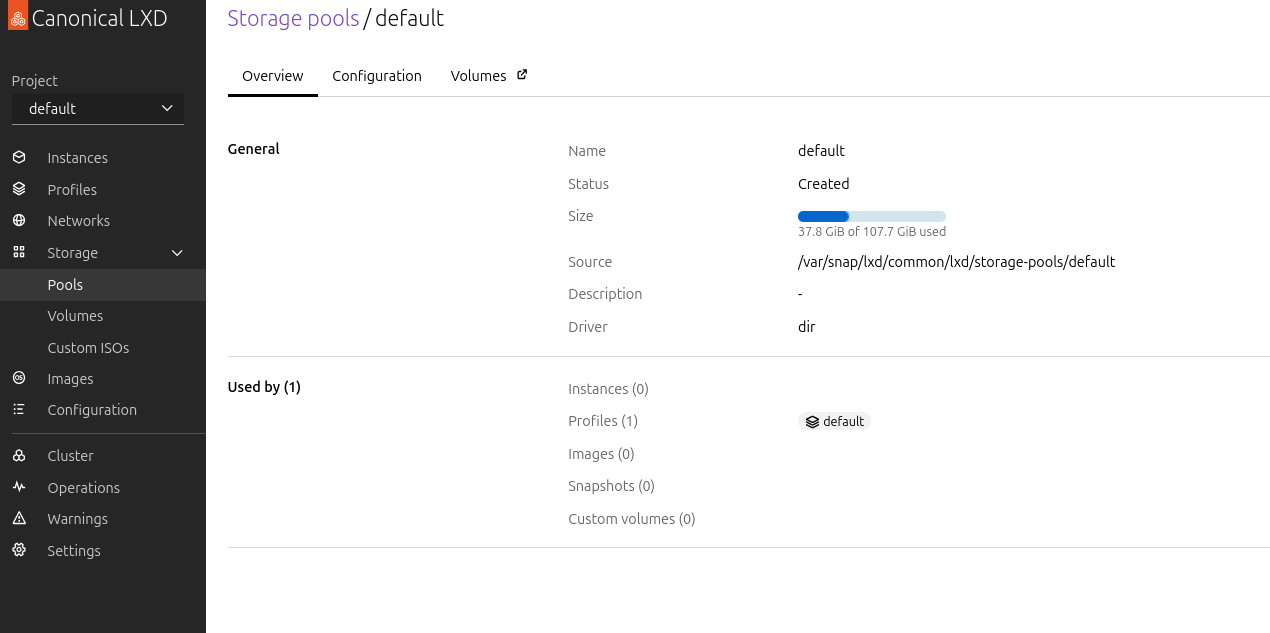
Let’s make this change via command line.
a. First create a new volume pool (I created mine in /mnt/storage2/VMs/lxd):
$ lxc storage create main dir source=/mnt/storage2/VMs/lxd

Storage pool main created
b. You can check that it was created with:
$ lxc storage list

+---------+--------+------------------------------------------------+-------------+---------+---------+
|  NAME   | DRIVER |                     SOURCE                     | DESCRIPTION | USED BY |  STATE  |
+---------+--------+------------------------------------------------+-------------+---------+---------+
| default | dir    | /var/snap/lxd/common/lxd/storage-pools/default |             | 1       | CREATED |
+---------+--------+------------------------------------------------+-------------+---------+---------+
| main    | dir    | /mnt/storage2/VMs/lxd                          |             | 0       | CREATED |
+---------+--------+------------------------------------------------+-------------+---------+---------+
c. Now let’s set it as the default pool:
lxc profile device set default root pool=[pool name]
When you create an instance, LXD automatically creates the required storage volumes for it, so I will not cover it here.
Creating Instances
Creating both container and VM instances via the UI is extremelly easy.
Containers
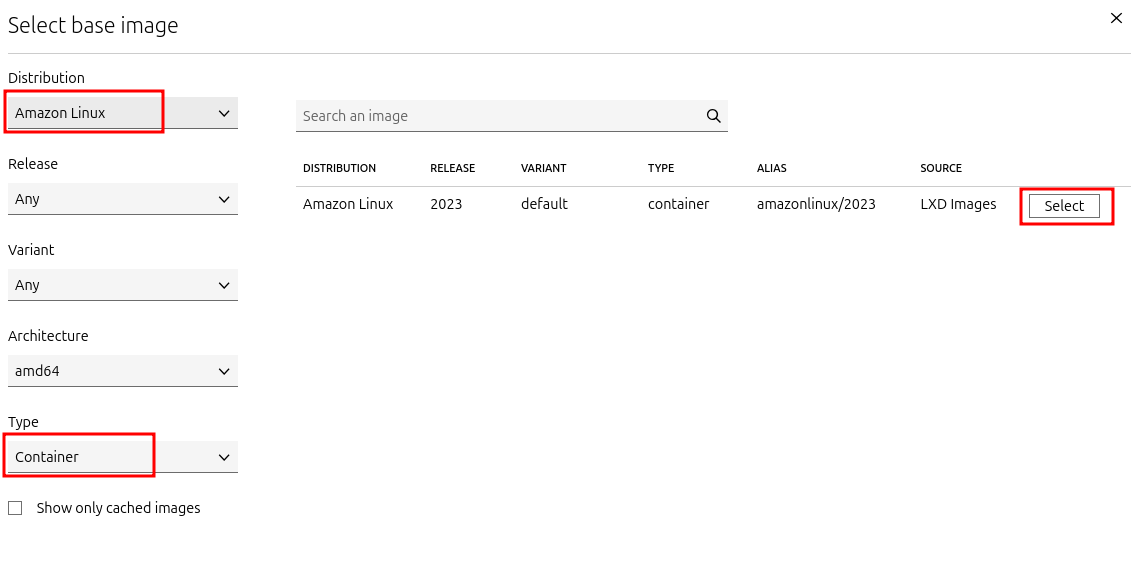
We are going to create a container based on the AmazonLinux 2023 image.
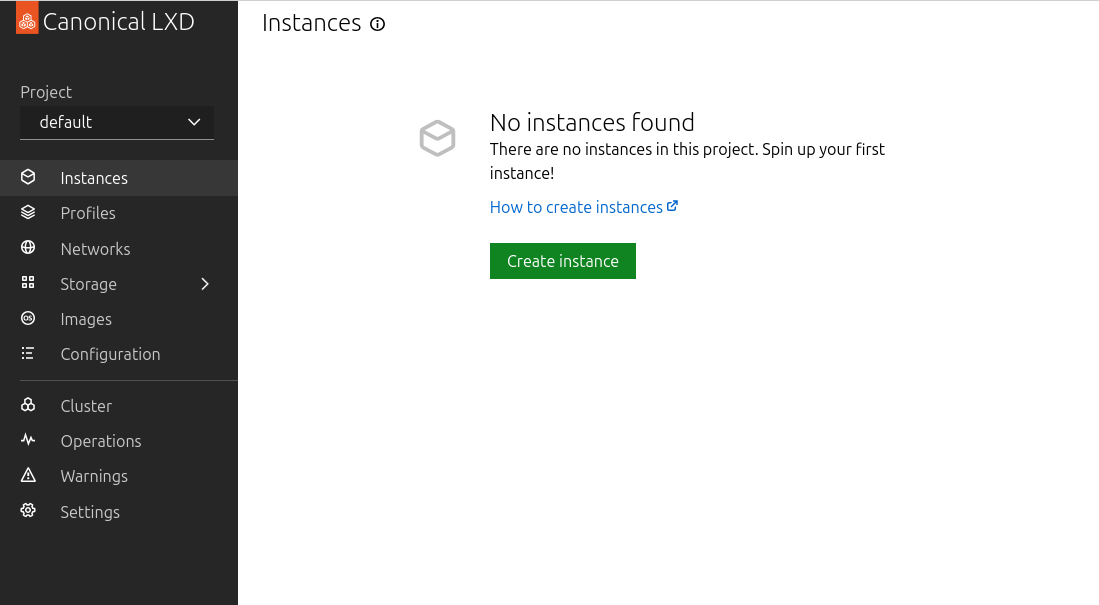
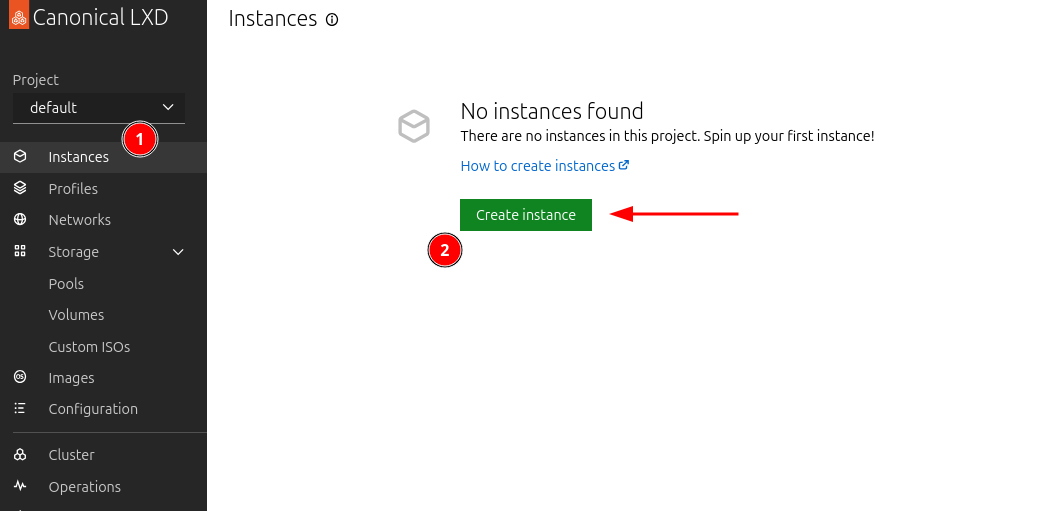
a. Back on the UI, browse to “Instances” and click on “Create instance”:
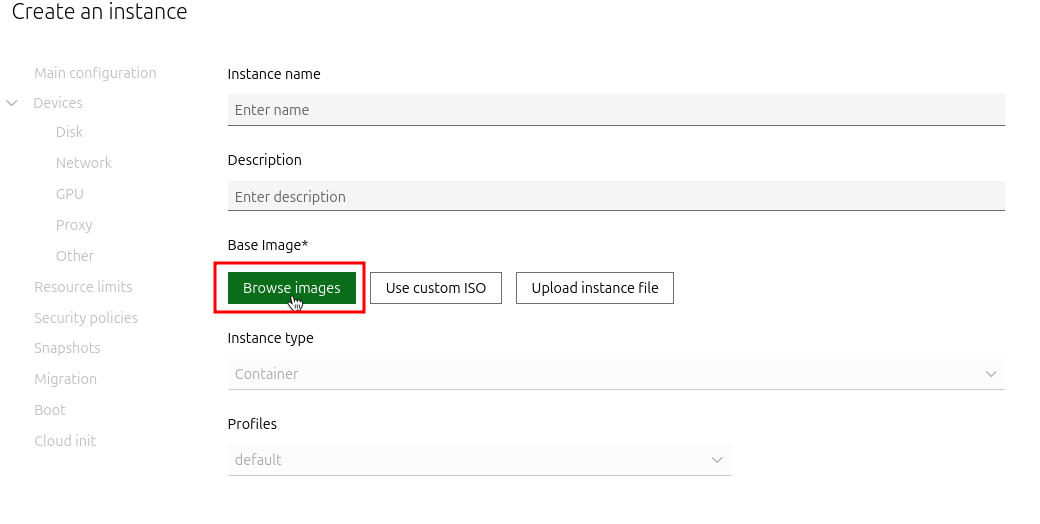
b. Click on “Browse images”:
c. Filter the distribution by “Amazon Linux”, the type as “Container”, and click on “Select”:
d. Give it a name and description and click on “Create and start”:
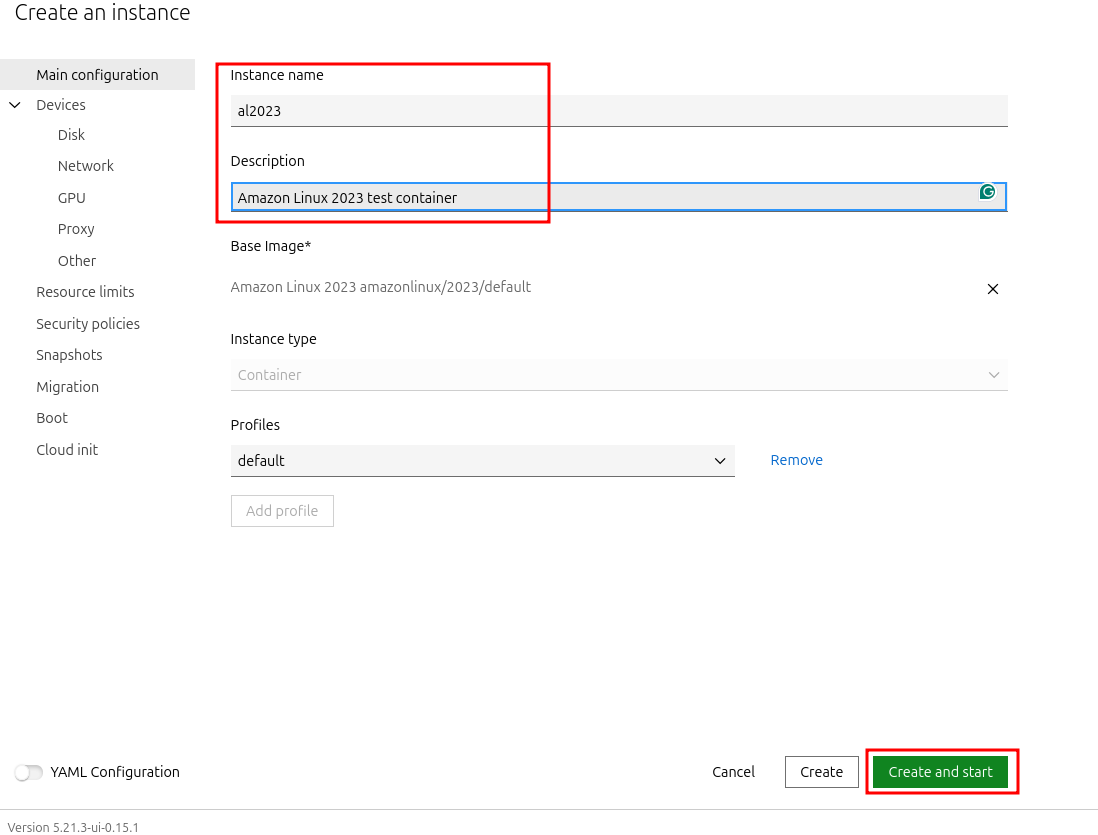
Tip: Don’t forget to poke around the options on the left next time you create an instance.
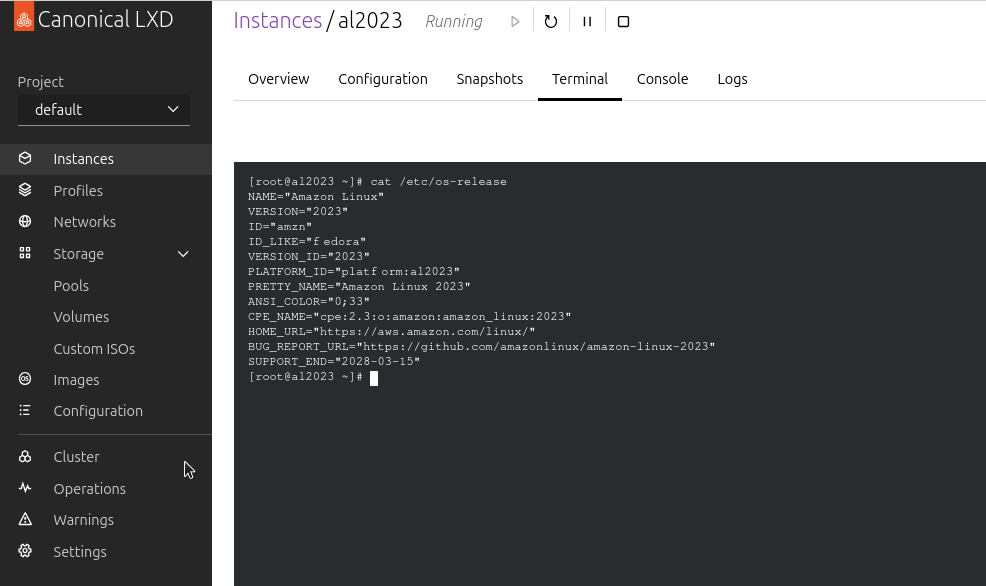
It should only take a few seconds for your container to be created and start running. You can access the container from the “Terminal” tab:
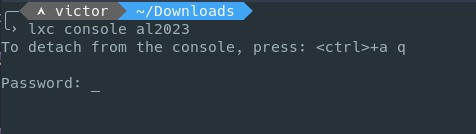
You can also access it via the terminal with lxc console, however that will require a password:
VMs
We are going to create an Ubuntu VM with graphical interface.
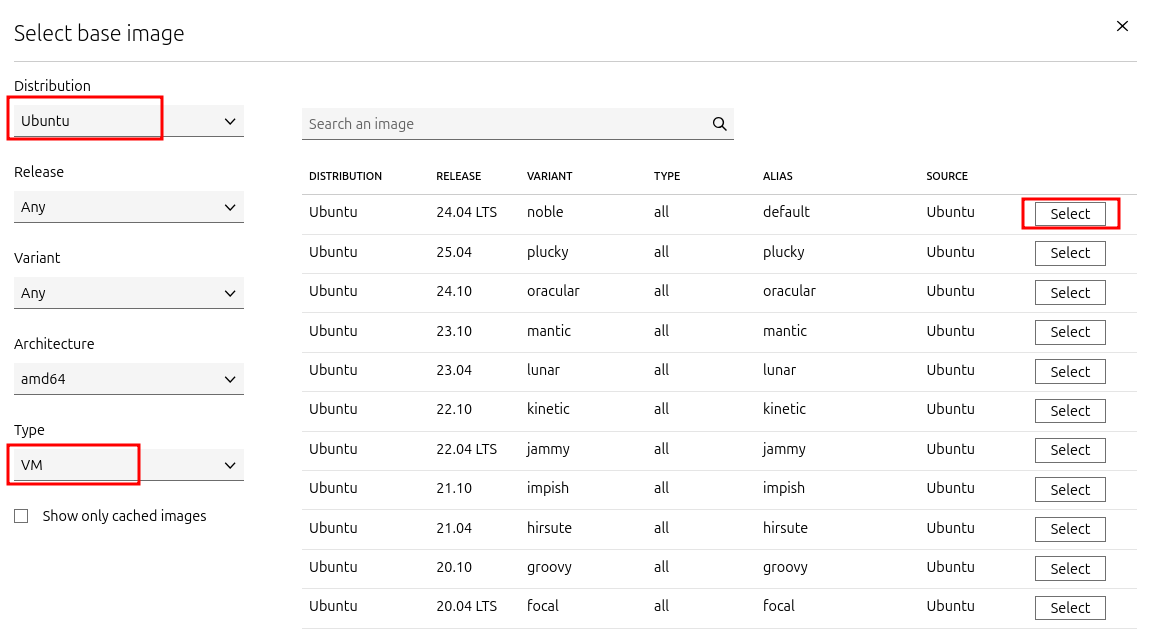
a. Repeat the same steps as before, but now select Ubuntu as the distribution, VM as the type, and a LTS version:
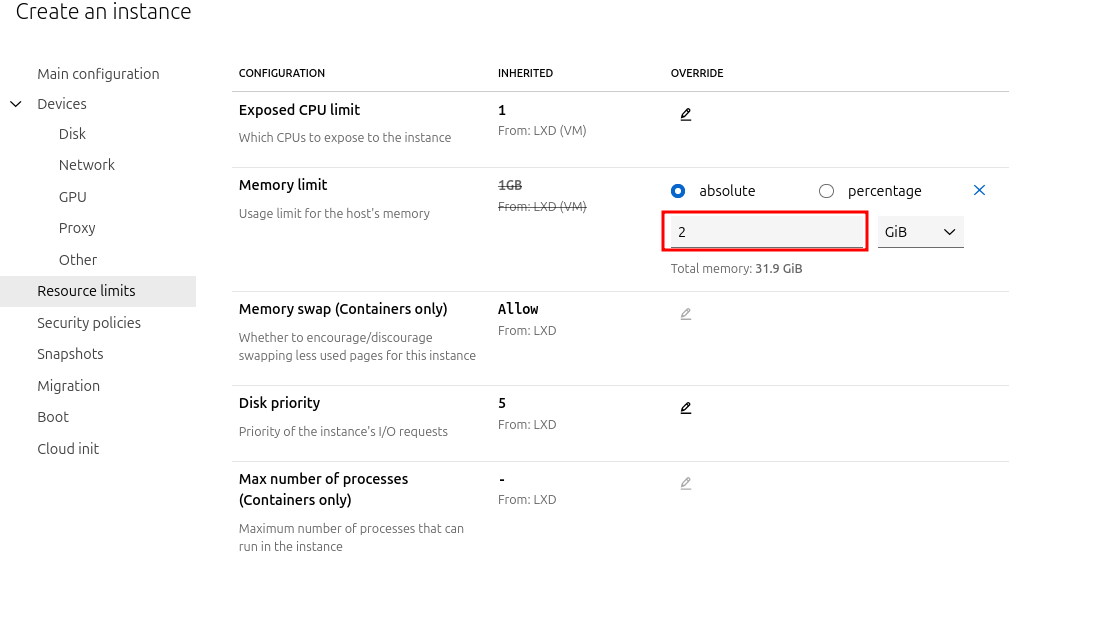
b. Give it a name/description, and under “Resource limits” set the memory limit to ‘2 GiB’. Then click on “Create and start”:
c. Once the VM is running, access the terminal tab the same way we did before and install ubuntu-desktop:
apt update && apt install ubuntu-desktop
Now is a great time to go grab a coffee… this will take a little while…
d. When the install is complete change the password for the ‘ubuntu’ user and reboot:
# passwd ubuntu

New password:
BAD PASSWORD: The password is shorter than 8 characters
Retype new password:
passwd: password updated successfully

# reboot
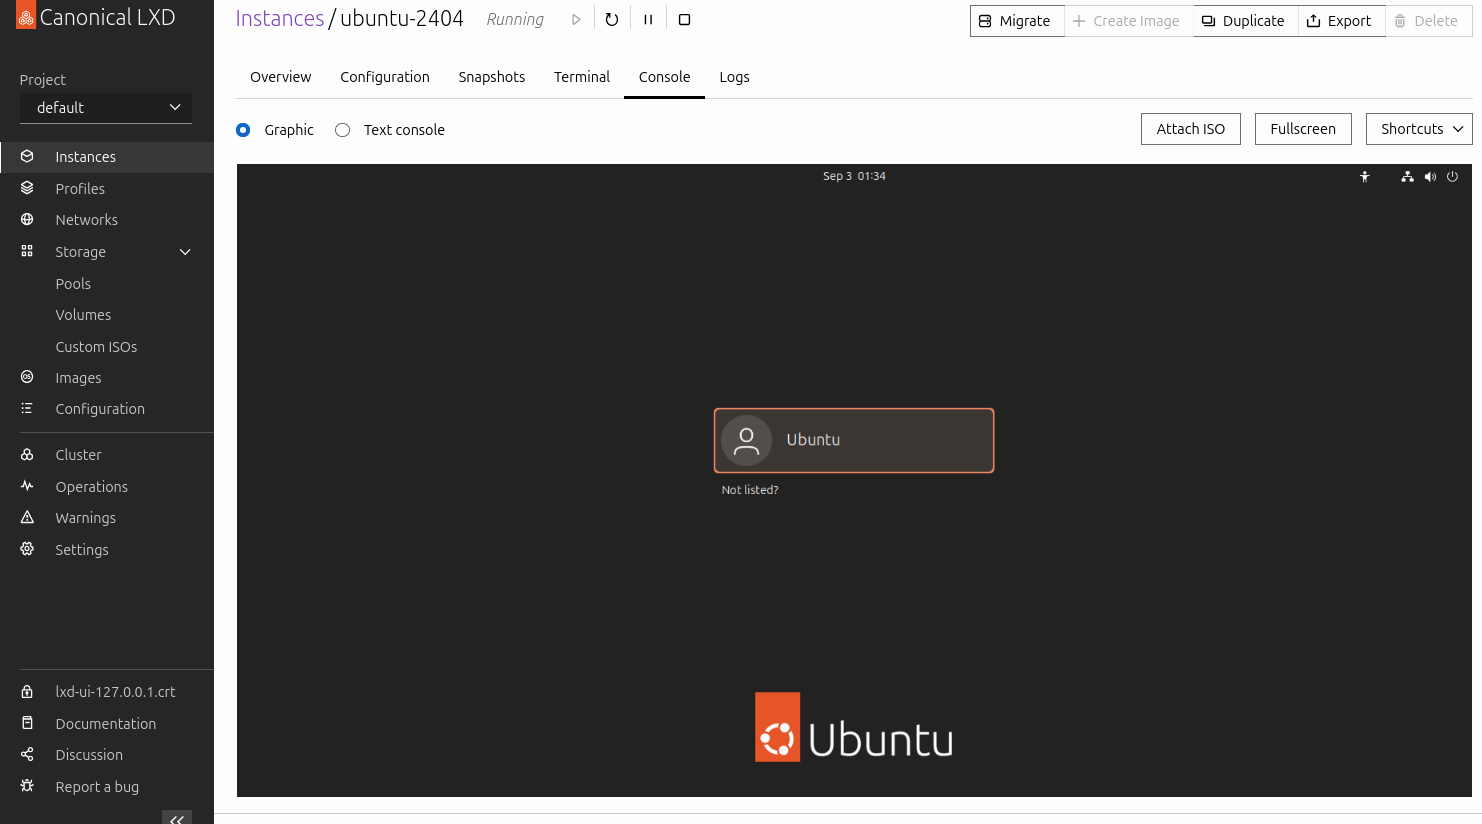
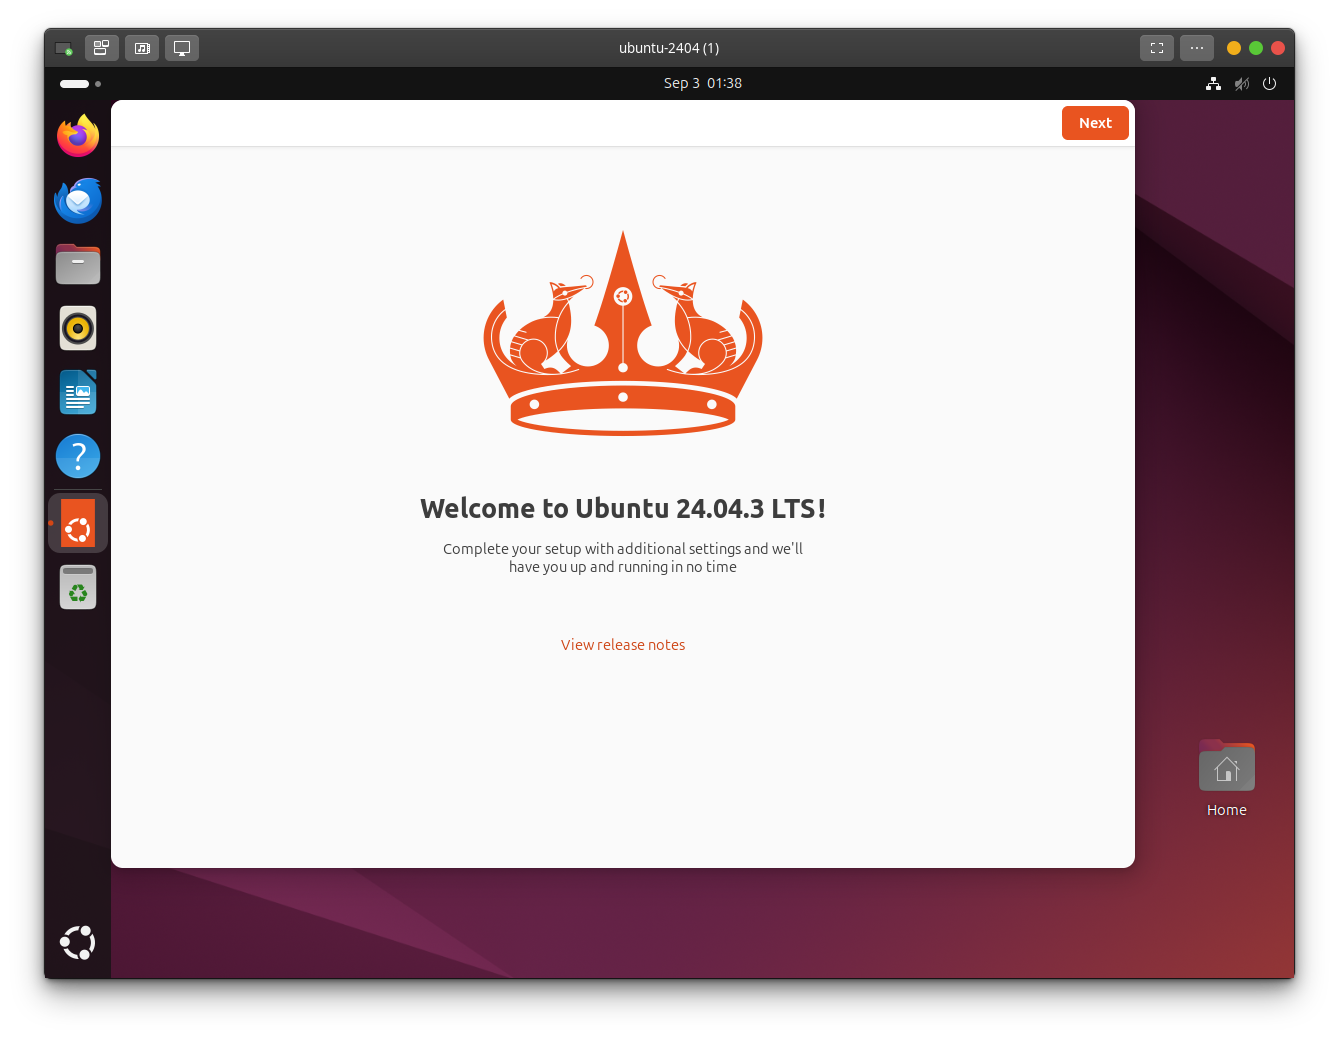
d. Go to the “Console” tab. You should see boot output and evetually be presented with the login window. You can login and use the VM from your browser:
And you can also access the VM graphical interface via the lxc connect command with the --type=vga flag:
lxc console ubuntu-2404 --type=vga
Conclusion
LXD might not be as flashy or widely known as Docker, but it fills a unique and valuable niche. It gives you the simplicity of containers and the power of full VMs — all under one roof. For homelabbers, that means less tool sprawl, cleaner management, and more flexibility to experiment.
Whether you’re just getting started with containers or looking to consolidate your virtualization setup, LXD is absolutely worth a try. With its web UI, clustering support, and straightforward setup, it can quickly become the backbone of a modern homelab.